Fortunately there is an option in Excel 2013 that allows you to quickly select all of the worksheets within your workbook, then apply a change to all of those worksheets simultaneously. So if you are in a situation where you need all of your worksheets in the same view, and you don’t want to go through every worksheet and adjust that setting manually, then our steps below will show you how to return all of your worksheets back to the Normal view. Microsoft Word similarly allows you to switch between different views. Our guide on how to do I get my Word document back to normal view can show you how to change views in that application.
How to Change the View Setting for All Worksheets at Once in Excel 2013
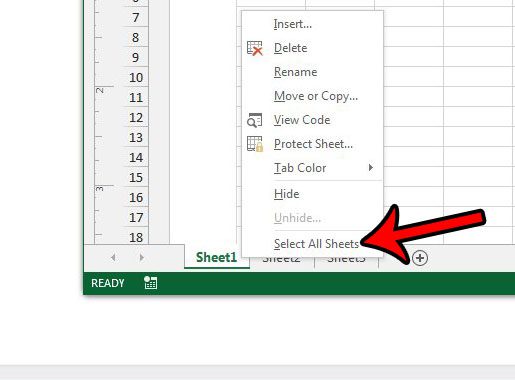
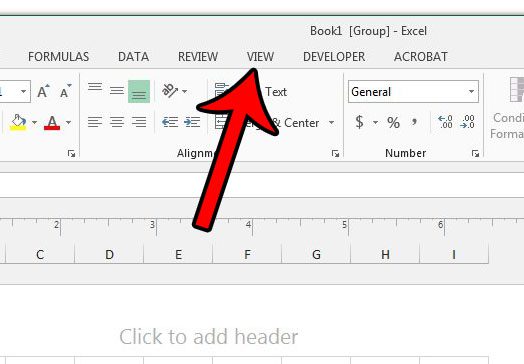
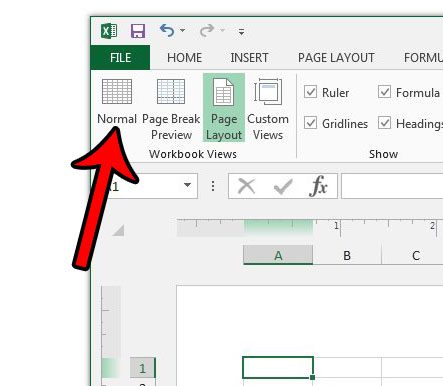
The steps in this article will show you how to quickly select all of the worksheets in a workbook, then apply the same view setting to all of them. While this guide will focus on changing the view setting to the Normal View option, you could select any of the other view options instead. Step 1: Open your workbook in Excel 2013. Step 2: Right-click one of the worksheet tabs at the bottom of the window, then click the Select All Sheets option. Step 3: Click the View tab at the top of the window. Step 4: Click the Normal option in the Workbook Views section of the ribbon. Note that this will work regardless of the individual view settings of each worksheet. Are you having trouble getting your worksheets to print properly? Read our Excel printing guide to see some of the more common print settings that you can use to make your spreadsheets print better. After receiving his Bachelor’s and Master’s degrees in Computer Science he spent several years working in IT management for small businesses. However, he now works full time writing content online and creating websites. His main writing topics include iPhones, Microsoft Office, Google Apps, Android, and Photoshop, but he has also written about many other tech topics as well. Read his full bio here.
You may opt out at any time. Read our Privacy Policy


